
Pearl Design On Nails - Your Guide To Elegant Manicures
Adding little pearl accents to your nails has become a really popular way to make your hands look special. It is a style that brings a touch of classic beauty and a little sparkle to your fingertips. People are finding it a charming way to express their personal sense of grace and style. This particular nail art choice, with its gentle shimmer, seems to be capturing the hearts of many who enjoy making their hands a bit more noticeable.
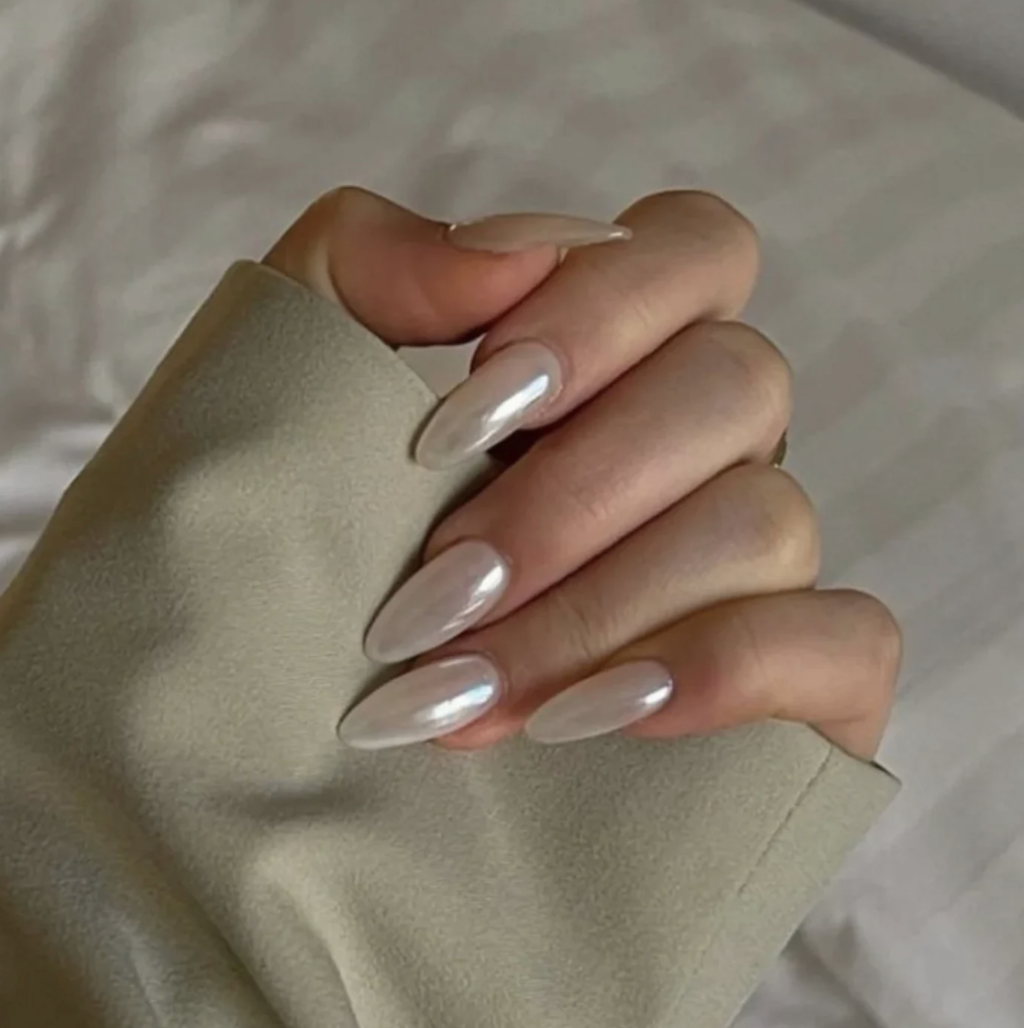
This approach to nail decoration, featuring small, round, lustrous beads, offers a pleasing mix of simple elegance and a subtle hint of glamour. It is a look that can go with almost anything, from a casual day out to a more formal gathering. The way these small, shiny pieces catch the light just a little makes your nails appear polished and thoughtful. It is, you know, a very versatile option for anyone wanting to spruce up their manicure.
This article will go into what makes this style so attractive, how you can begin putting these designs on your own nails, and some neat ways to wear them. We will also talk about keeping your pretty pearl nails looking good for a while. You will, perhaps, find some new ideas to try for your next nail art adventure.
Table of Contents
- What Makes Pearl Design on Nails So Appealing?
- Getting Started with Pearl Design on Nails
- Are There Different Ways to Style Pearl Design on Nails?
- Tips for Applying Pearl Design on Nails
- How Do You Keep Your Pearl Design on Nails Looking Good?
- Can Anyone Do Pearl Design on Nails at Home?
- Final Thoughts on Pearl Design on Nails
What Makes Pearl Design on Nails So Appealing?
There is something truly special about the way small, shiny pearls look on your nails. They have a kind of soft glow that feels both old-fashioned and very current. It is a style that does not shout for attention but still gets noticed for its quiet beauty. People seem to be drawn to it because it adds a refined touch without being over the top. So, it is almost like wearing tiny pieces of jewelry on your fingertips.
The gentle shimmer of these little beads gives off a subtle light, making your hands appear more put-together and cared for. It is a look that suggests a love for fine details and a preference for understated charm. You know, unlike some other nail art trends that might be very bold or colorful, pearl designs bring a sense of calm and collected grace. This makes them a good choice for many different kinds of people and many different events.
A lot of what makes pearl design on nails so popular comes from its ability to fit in everywhere. You can wear them to a fancy dinner, to a casual get-together with friends, or even just for your everyday errands. They do not clash with your clothes or other accessories. In fact, they often make everything else you are wearing look a bit more polished. That, is that, a really nice benefit of choosing this particular style.
The texture that these little round pieces add to your nails is also part of their appeal. It is not just a flat picture; it is something you can feel, which adds another layer of interest. This small, raised surface catches the light in a unique way, creating tiny shadows and bright spots that change as you move your hands. It is a subtle three-dimensional effect that really makes the design stand out without being too much.
Also, the simple, clean lines of a pearl are very pleasing to the eye. They are perfectly round or nearly so, which gives a sense of completeness and order to your nail art. This geometric purity, combined with their natural luster, makes them a timeless choice. Many people find this classic appeal very comforting and stylish, making pearl design on nails a truly lasting trend.
Getting Started with Pearl Design on Nails
If you are thinking about trying out pearl design on nails, there are a few simple things you will want to get ready. It is not too hard to begin, but having the right bits and pieces makes the process much smoother. You will need some tiny pearls, of course, and a good way to stick them onto your nails. You know, having everything laid out beforehand really helps.
The size of the pearls you pick will make a big difference in the final look. Some people like very tiny ones that are almost like dust, while others prefer slightly larger beads that are more noticeable. It really depends on the kind of style you are going for. You might also want to think about the color of your nail polish, as that will be the background for your pearl design on nails.
Getting your nails ready is also a pretty important step. Clean, smooth nails give the pearls the best surface to stick to. You will want to make sure they are shaped nicely and that any old polish is completely gone. This little bit of preparation can save you some trouble later on, believe it or not.
Picking Your Pearl Design on Nails Pieces
When you are choosing the tiny pearls for your nail art, you will find they come in many different sizes and even some different colors, though white and off-white are most common. Smaller pearls are good for delicate patterns, like a sprinkle across the nail or a neat line along the edge. Larger pearls can be used as a single, striking accent or in a bolder pattern. You can, too, get ones that are half-round, which sit flatter on the nail.
You will also need a special kind of glue or a very thick top coat polish to attach them. Some people use a dotting tool or a pair of fine tweezers to pick up the tiny pearls and place them exactly where they want them. This makes it easier to create precise pearl design on nails, especially if you are working with very small pieces. It is just a little bit of a knack to get the hang of it.
Consider the overall effect you want to achieve. Do you want a subtle shimmer or a more obvious raised texture? This will help guide your choice of pearl size and how many you plan to use on each nail. For example, a single pearl near the cuticle on a bare nail can be quite striking, while many tiny pearls can create a textured surface. You know, there are so many possibilities.
Prepping Your Nails for Pearl Design on Nails
Before you even think about putting pearls on, your nails need a good cleaning and shaping. Start by gently pushing back your cuticles and trimming any hangnails. Then, file your nails to your desired shape, whether that is a neat square, a soft oval, or something else. This step is pretty basic but really important for a neat finish. Basically, clean nails are happy nails for pearl application.
Next, give your nails a quick buff to smooth out any ridges. This creates a nice, even surface for your base coat and polish. After buffing, wipe your nails with a bit of rubbing alcohol or a nail cleanser. This removes any dust or natural oils that could stop your polish or the pearls from sticking well. You want a really clean slate for your pearl design on nails.
Apply a thin layer of base coat. This helps protect your natural nails from staining and gives the colored polish something to grip onto. Let it dry completely. Then, put on two thin coats of your chosen colored nail polish, allowing each coat to dry fully before adding the next. This careful layering helps your pearl design on nails last longer and look better. It is, you know, a bit like building a strong foundation.
Are There Different Ways to Style Pearl Design on Nails?
Absolutely, there are many creative ways to put pearl design on nails. You are not limited to just one look. Some people like to stick to very traditional patterns, while others enjoy mixing things up and trying something new and unexpected. It is all about what feels right for your own personal flair. You can, like, really make it your own.
You can use pearls to create simple, elegant lines, or you can arrange them in more complex patterns that cover a larger part of the nail. The background color of your nail polish also plays a big role in how the pearls will stand out. A light, neutral color will make the pearls pop, while a darker shade can give a more dramatic contrast. It is, you know, quite interesting how much variety you can get.
Some folks like to put just one or two pearls on each nail, while others might cover an entire nail with them for a very textured effect. The choice is truly yours, and it depends on how much sparkle and dimension you want to add. There is no single "right" way to do it, which is part of the fun. So, just a little imagination can go a long way.
Classic Pearl Design on Nails Looks
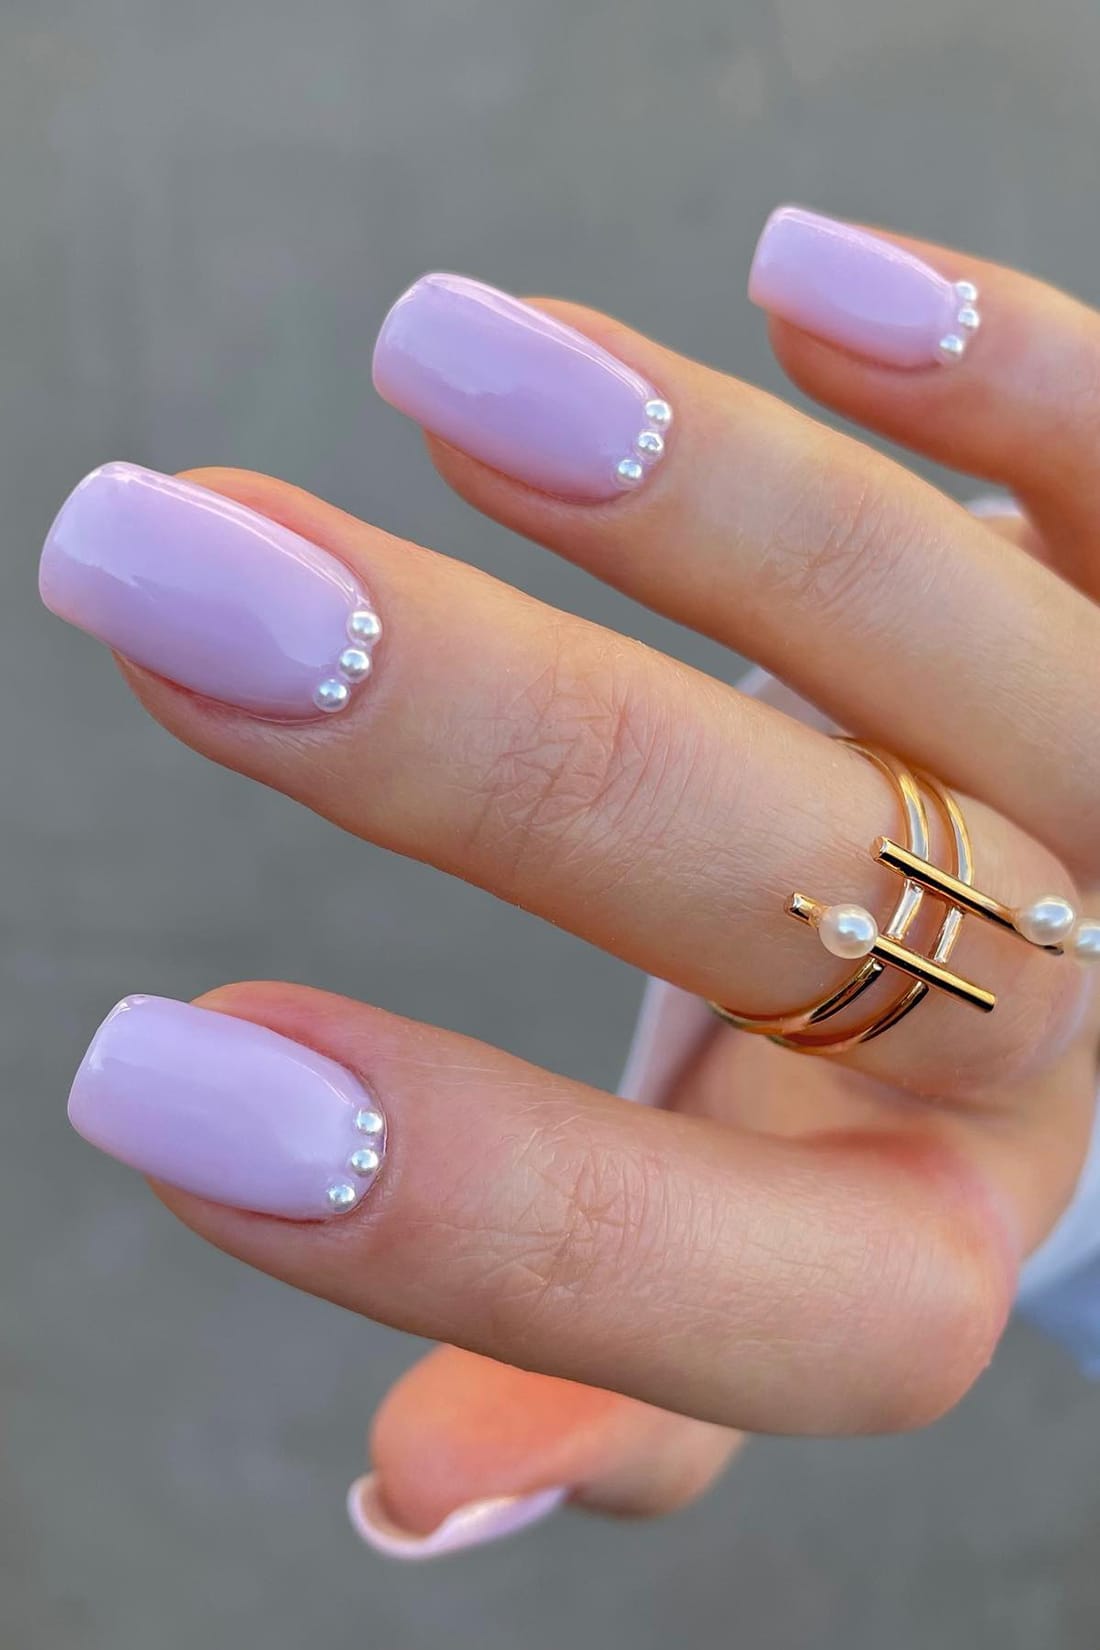
For a truly timeless feel, consider placing a single pearl at the base of each nail, right above the cuticle. This creates a very refined and subtle accent that catches the light beautifully. It is a simple touch that speaks volumes about elegance. This kind of pearl design on nails is often seen with clear or light pink polish, which makes the pearl the main attraction. It is, you know, a very clean look.
Another popular classic style involves creating a half-moon shape with tiny pearls at the base of the nail. This echoes the natural curve of your nail bed and adds a delicate frame to your manicure. It is a bit more involved than a single pearl but still maintains that sense of understated grace. This can be done on all nails or just one or two accent nails. It is, in a way, a little nod to vintage styles.
French tips with a pearl twist are also a lovely option. Instead of just a white tip, you can line the edge of your nail with a row of very small pearls. This adds a three-dimensional sparkle to a traditional look, making it feel fresh and new without losing its classic appeal. This pearl design on nails is pretty and quite striking, yet still very sophisticated.
Modern Pearl Design on Nails Twists
If you are feeling a bit more adventurous, you can try scattering pearls randomly across one or two nails for a playful, almost bubbly effect. This looks great on a solid colored nail, perhaps a pastel shade or a deep jewel tone. The pearls can be different sizes, too, adding to the whimsical feel. This kind of pearl design on nails is quite popular for those who want something unique.
Another contemporary idea is to use pearls to create geometric patterns. Think straight lines, triangles, or even small squares made from tiny pearls. This gives a very modern and artistic feel to your manicure. You can use a fine brush or a dotting tool to help you get the lines just right. It is, you know, a bit more challenging but the results can be really striking.
You could also combine pearls with other small decorative elements, like tiny glitter pieces or metallic studs, for a mixed-media look. This adds more texture and visual interest to your pearl design on nails. For example, you could have a few pearls alongside a line of silver beads. This kind of approach allows for a lot of personal expression and can make your nails truly one-of-a-kind. It is, like your, own little masterpiece.
Tips for Applying Pearl Design on Nails
When you are putting the pearls on, make sure your nail polish is still a little bit wet but not runny. This gives the pearls something to sink into and stick to. If the polish is too dry, they will not stay put. You can, for instance, apply a small dot of clear top coat where you want to place each pearl, then gently press the pearl into that spot.
Using a wax pencil or a special tool with a sticky tip can make picking up and placing those tiny pearls much easier. These tools help you grab the pearl without it rolling away and allow for very precise placement. It is, you know, a real help when you are working with such small items. Just a little pressure is usually enough to secure them.
Once all your pearls are in place, apply a generous layer of clear top coat over your entire nail, making sure to go over and around the pearls. This helps to seal them in and protect them from falling off. You might need to apply two coats of top coat for extra security, especially if the pearls are a bit larger. This step is pretty important for making your pearl design on nails last.
Try to avoid dragging the brush directly across the top of the pearls with too much force, as this can dislodge them or cause the top coat to pool around them in an odd way. Instead, use a gentle dabbing motion or float the top coat over them. This careful application will help keep your pearl design on nails looking smooth and neat. It is, basically, about being gentle.
How Do You Keep Your Pearl Design on Nails Looking Good?
Keeping your pearl design on nails looking fresh and beautiful for as long as possible takes a little care. Since the pearls are raised from the nail surface, they can sometimes catch on things or get knocked off if you are not careful. So, a bit of mindfulness in your daily activities goes a long way. You know, just being aware of your hands.
The most important thing is to use a good quality top coat and reapply it every couple of days. This adds an extra layer of protection over the pearls, helping to keep them stuck firmly in place and giving your manicure a renewed shine. A fresh coat of clear polish can make a big difference in how long your pearl design on nails lasts. It is, like, a simple habit that pays off.
When you are doing chores that involve water or harsh cleaners, it is a really good idea to wear gloves. Water can weaken the glue or polish holding the pearls, and cleaning products can dull their shine. Protecting your hands with gloves will help keep your pearl design on nails looking their best for much longer. This is, you know, a very practical tip.
Try to be gentle with your hands. Avoid picking at the pearls or using your nails as tools, like opening cans or scraping labels. These actions can easily dislodge the tiny decorations. Being mindful of how you use your hands will help preserve the beauty of your pearl design on nails. It is, pretty much, about treating your manicure with respect.
If a pearl does happen to come off, do not worry too much. If you still have the pearl, you can usually reattach it with a tiny drop of nail glue or thick top coat. Just make sure the area is clean and dry before you try to put it back on. This way, you can fix little issues without having to redo your entire pearl design on nails. It is, sort of, a quick repair.
Can Anyone Do Pearl Design on Nails at Home?
Yes, absolutely! Creating pearl design on nails at home is something many people can do, even if they are new to nail art. It might seem a little tricky at first because the pearls are so small, but with a bit of patience and the right tools, you can definitely achieve a beautiful look. You know, practice makes perfect, as they say.
Starting with simpler designs is a good way to build your confidence. Try placing just one pearl on each nail, or creating a simple line. As you get more comfortable with handling the tiny pearls and placing them, you can move on to more complex patterns. It is, kind of, a skill you develop over time.
There are lots of helpful videos and step-by-step guides available online that can show you exactly how to do it. Watching someone else do it can give you a clear idea of the process and some useful tricks. You can pause and replay parts as many times as you need to. This visual guidance is, honestly, a great resource for learning pearl design on nails.
Having the right tools also makes a big difference. A wax pencil or a dotting tool with a sticky end is incredibly useful for picking up and placing the pearls accurately. These tools are not expensive and can be found at most beauty supply stores or online. They really simplify the process of creating pearl design on nails. It is, just, about having the right gear.
Do not get discouraged if your first attempt is not perfect. Nail art, like any creative activity, takes a little bit of getting used to. The most important thing is to have fun with it and enjoy the process of making your nails look pretty. Every time you try, you will get a little bit better at creating your own pearl design on nails. So, just keep trying!
Final Thoughts on Pearl Design on Nails
Pearl design on nails offers a lovely way to add a touch of grace and sparkle to your manicure. It is a style that blends classic beauty with a modern appeal, making it suitable for many occasions. Getting started involves picking your pearl pieces and preparing your nails properly. There are many ways to style these designs, from simple, classic looks to more playful, modern twists. Keeping your pearl nails looking good means using a good top coat and being gentle with your hands. Anyone can try this at home with a bit of practice and the right tools.
Article Recommendations
- Caramel Balayge
- Disgusting Ice Cream Flavors
- Mixed Match Nails
- Freaky In The Sheets
- Best Shows From The 2000s
Detail Author:
- Name : Callie Bode
- Username : cristina.davis
- Email : annetta.emard@hotmail.com
- Birthdate : 1976-09-01
- Address : 51928 Amos Prairie Port Verlie, IL 58130-2148
- Phone : 281-950-0392
- Company : Bosco, Hill and Moen
- Job : Gaming Supervisor
- Bio : Maxime magnam nobis suscipit. Ea quam rerum autem aspernatur harum tempora. Fugit cumque et reprehenderit ut dolores. Dolor laborum facere et a labore aut ut. Quia qui earum qui in enim eius et.
Socials
tiktok:
- url : https://tiktok.com/@katrine8275
- username : katrine8275
- bio : Ipsum et quaerat nemo amet perferendis dignissimos repellendus.
- followers : 4474
- following : 2155
twitter:
- url : https://twitter.com/katrine3914
- username : katrine3914
- bio : Ab nihil velit rerum omnis dolorum tenetur. Beatae facilis eaque tempore. Doloribus quia voluptatibus amet asperiores. Sunt in repellat esse est minima.
- followers : 4305
- following : 673
instagram:
- url : https://instagram.com/katrine.wisozk
- username : katrine.wisozk
- bio : Ut culpa omnis vel sit suscipit porro. Et ratione officiis et delectus officia assumenda sunt ad.
- followers : 6882
- following : 1224
facebook:
- url : https://facebook.com/katrine_dev
- username : katrine_dev
- bio : Sapiente magni ut nam atque commodi quaerat.
- followers : 5342
- following : 2691
